- See Also
- Get Started 1 Review your live calendar and Trumba editing environment
- Get Started 2 Update fields and settings, and create events
- Get Started 3 Spuds, publishing, and integrating calendars
- Get Started 5 Event and calendar actions
- Get Started 6 Event registration
Get Started 4: Scheduled calendar email
Your site visitors may want to receive a weekly digest of new and updated events by email, rather than having to keep checking back for the latest additions and changes. Visitors can subscribe to your published calendars themselves, or you can add them to the distribution list for a calendar manually.
Note You can also set up and send announcement, reminder, and/or invitation email messages for specific events.
In this article:
- Site visitors subscribe to your calendar
- Add people to the calendar email distribution list manually
- Create a group (distribution list) in your Address Book
- Set up a calendar email
- Customize email appearance
Tip You can print this article from your browser, or to work on-screen, you can open two browser windows, one with this article and the other with the Trumba editing environment.
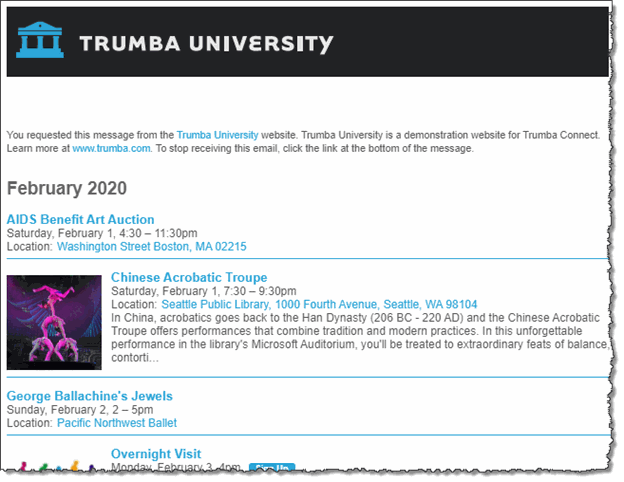
Example of a digest email from the fictional Trumba University calendar:
Site visitors subscribe to your calendar
Most commonly, site visitors set this up themselves by clicking a Subscribe link on your published calendar (unless you disable this feature). When site visitors subscribe, they are automatically added to the distribution list for your calendar.
Assuming you're working with your hosted calendar and the defaults generated by the Trumba Startup Wizard, however, you won't yet have a published calendar.
For information on how this works for published calendars, see Calendar subscriptions.
Add people to the calendar email distribution list manually
You can also add people to the distribution list for your calendar manually, and test how to do that in your hosted calendar (including after having completed the Trumba Startup Wizard during your free trial period).
- Go to the Trumba home page. Click Sign in to sign in to your Trumba account.
- In the Trumba editing environment, click Email Calendar above your calendar:

- Click Edit Distribution List at the top left.
When your distribution list is empty, it looks like this:
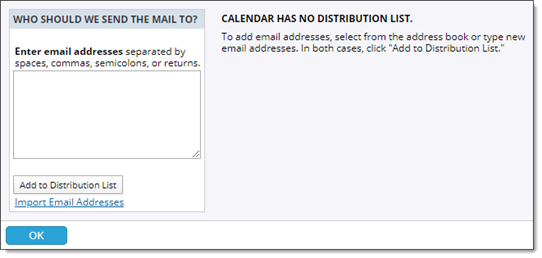
- In the box under Enter email addresses, type an example email address (or more), and then click Add to Distribution List.
- Click OK.
The addresses on the distribution list are now set up to receive the weekly digest calendar email.
Create a group (distribution list) in your Address Book
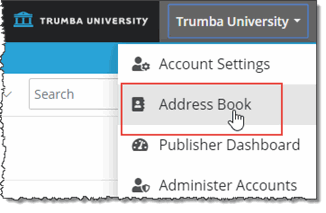
In Trumba, your Address Book is where you store email addresses for your site visitors and other contacts. You can open your Address Book at any time by clicking your account name in the upper-right corner, and then clicking Address Book in the drop-down menu, such as shown here:
Think of your Address Book as a comprehensive group, the group that contains all of the email addresses that you've added manually or imported into Trumba.
You can collect subsets of this comprehensive group into smaller groups, or distribution lists, for specific purposes. For example, you might offer seminars on two different products that appeal to overlapping lists of customers. You can create a separate group for each product.
Tips
- Site visitors can also subscribe to your calendar themselves, which automatically adds them to the distribution list for the calendar. For more information, go to Stay informed about upcoming events in Get Started 5.
- Site visitors' email addresses can appear in multiple groups. And, the email addresses in any group can be part of the top-level Address Book.
- Go to the Trumba home page. Click Sign in to sign in to your Trumba account.
- At the top of the page in the Trumba editing environment, click Address Book:

When your Address Book is empty, it looks something like this:
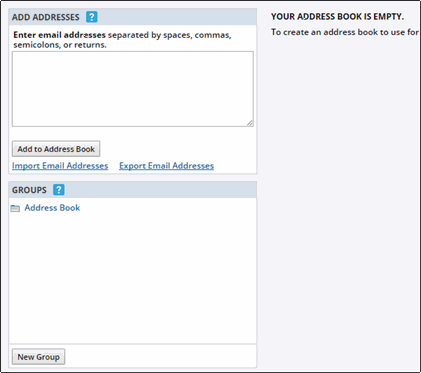
- In the box under Enter email addresses ..., type five example email addresses, separated by spaces, commas, semicolons, or returns.
- Click Add to Address Book.
The email addresses appear in the Address Book section on the right.
- Back on the left under Groups, click New Group.
- Move your cursor over Group 1 and select it. Type a new name, such as Test.
On the right, it will say that the Test Group is empty.
- Click the Address Book group. Select three of the email addresses listed in the Address Book.
- At the top of Address Book section, in the first drop-down list, you should see Copy to group. In the second drop-down list, you should see Test (or whatever name you gave your group). Click Go. Click OK to confirm you want to copy the addresses.
- Under Groups, click Test.
The three email addresses you just added to the group are listed on the right.
- Click Return below the Address Book to return to your calendar.
Set up a calendar email
Now that you've created a group (distribution list) of site visitors who share a common interest, you can set up a scheduled calendar email specifically for that group.
- In the Trumba editing environment, click Email Calendar above your calendar:

On the Email Options page, in the Preview of the Next Email section, you'll see a default calendar email already created for you.
- Click Edit Distribution List at the top left.
- Under Who Should We Send The Mail To?:
- Select the group you created in the procedure above (we'd named it Test).
- Click Add to Distribution List.
The Test group appears under Email Distribution List on the right:

Click OK.
- Back on the Email Options page, click Edit Schedule.
- Under When Should We Send The Email?, choose what day and how often you want the email message to be automatically sent. Select Weekly on Sunday for this example.
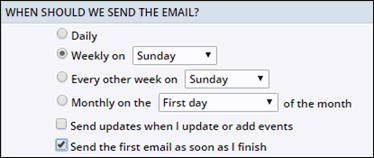
- Also, select Send the first email as soon as I finish so you'll immediately see an example of the message you're sending.
- Under What Message Should We Send With the First Email?, type a message to inform recipients about the purpose of your scheduled email messages.
- Under How Much Calendar Data Should We Send Each Time?, choose the events that you want the email message to contain. Select All future events for this example.
- Leave the other default settings as is, and then click OK.
- Back on the Email Options page, click Refresh Preview to see your message appear in the email preview window.
- Click OK to set up the scheduled email and immediately send the first message.
Recipients can click an event title to view event details, add events to their personal calendars, and take other actions.
Tips
- Recipients can opt out of future notifications by clicking a link at the bottom of the email they receive. (The people that you'd added to the test group in the procedure above can do the same on their test message.)
- To avoid sending test calendar email messages every week, we recommend that you cancel the scheduled email and delete the distribution list. To do so:
- Click Email Calendar above the calendar, and then click Edit Distribution List.
- Under Email Distribution List, select Test (or whatever name you gave the group you created), and then click Remove Selected.
- Click Return to [yourcalendarname].
- Click Email Calendar again, and then click Delete Schedule.
- Click Return to [yourcalendarname].
Customize email appearance
You can customize the calendar and event email messages that you send to your customers so they reflect your organization's brand. Using standard HTML code, you can include logos, text, and other personalized formatting as a banner in your messages. You can also control font styles, sizes, and colors as well as the privacy statement that appears at the bottom of the messages.
The following email message from a fictional Trumba University website gives you a sense of the kind of customization that's possible.

- In the Trumba editing environment, click Publish Settings above your calendar.
- On the Publishing Control Panel page, click the Email tab.
- In the Calendar Email section, below the List calendar email spud description, click Edit Settings & Styles.
- On the Edit Settings page, General Settings tab, Email Settings section, Email header field, click Source.
You can use standard HTML code to customize and style the text of the message.
To test this, copy the following code and paste it into the Email header field:
<img src="https://eventactions.com/help/images/tu_new_crest.png"> - Click Preview to see a preview of the calendar email message with the Trumba University logo at the top.
- Close the Preview window, and then click Cancel to reverse that change.
- Back on the Email tab, Calendar Email section, below the List calendar email spud description, click Edit Settings & Styles again, and then go to the General Settings tab again.
- In the Heading section, change the Size to 30pt (and any other change you'd like to test).
- Click Preview to see the results.
- You wouldn't want to keep these changes necessarily, but it gives you an idea of what's possible.
Click Cancel to reverse the changes.
Tip You can customize event action emails for reminders, invitations, announcements, and event submission email messages in a similar way. On the Publishing Control Panel page, click the Email tab. In the Event Email section, you can customize the various types of event emails.
